Category: Editorial

  • How to Reduce Body Weight

    How to Reduce Body Weight

    Reducing body weight is a journey that involves a combination of dietary adjustments, increased physical activity, and sustainable lifestyle changes. It’s not just about shedding pounds quickly; it’s about building habits that lead to lasting health benefits. This guide outlines the key steps and strategies to help you achieve your weight reduction goals safely and effectively.

    Understanding the Basics of Weight Loss

    At its core, weight loss (or weight reduction) is about achieving a calorie deficit. This means consistently consuming fewer calories than your body burns each day. Your body requires a certain amount of energy (calories) to perform basic functions (like breathing, blood circulation, and maintaining body temperature), known as your Basal Metabolic Rate (BMR), plus additional calories for physical activity.

    • Calorie Deficit: If you consume 500 fewer calories per day than your body burns, you can expect to lose approximately 1 pound (0.45 kg) of fat per week, as 3,500 calories roughly equate to 1 pound of fat.
    • Sustainability: Rapid weight loss can often be unsustainable and lead to nutrient deficiencies or muscle loss. A healthy and sustainable rate of weight reduction is typically 1-2 pounds (0.45-0.9 kg) per week.

    Step 1: Assess Your Current Situation and Set Realistic Goals

    Before making any changes, understand your current health status and define clear, achievable goals.

    1. Consult a Healthcare Professional:
      • Why it’s important: Before embarking on any weight loss journey, especially if you have underlying health conditions, consult your doctor or a registered dietitian. They can provide personalized advice, assess your current health, identify any potential risks, and help determine a safe and appropriate weight reduction plan for you.
      • They can also help you understand your Body Mass Index (BMI), which is a measure of body fat based on height and weight. While BMI has limitations, it provides a general indicator of healthy weight ranges.
    2. Determine Your Basal Metabolic Rate (BMR) and Total Daily Energy Expenditure (TDEE):
      • Your BMR is the number of calories your body needs to function at rest. Online calculators can estimate this using your age, gender, height, and weight (e.g., Mifflin-St Jeor equation).
      • Your TDEE includes your BMR plus the calories burned through physical activity. Understanding your TDEE helps you determine the appropriate calorie deficit.
    3. Set SMART Goals:
      • Goals should be Specific, Measurable, Achievable, Relevant, and Time-bound.
      • Instead of “I want to lose weight,” try “I will lose 10 pounds in 10 weeks by reducing my daily calorie intake by 500 calories and exercising 3 times a week.”

    Step 2: Make Sustainable Dietary Changes

    Nutrition is the cornerstone of weight reduction. Focus on nutrient-dense foods and mindful eating habits.

    1. Prioritize Whole, Unprocessed Foods:
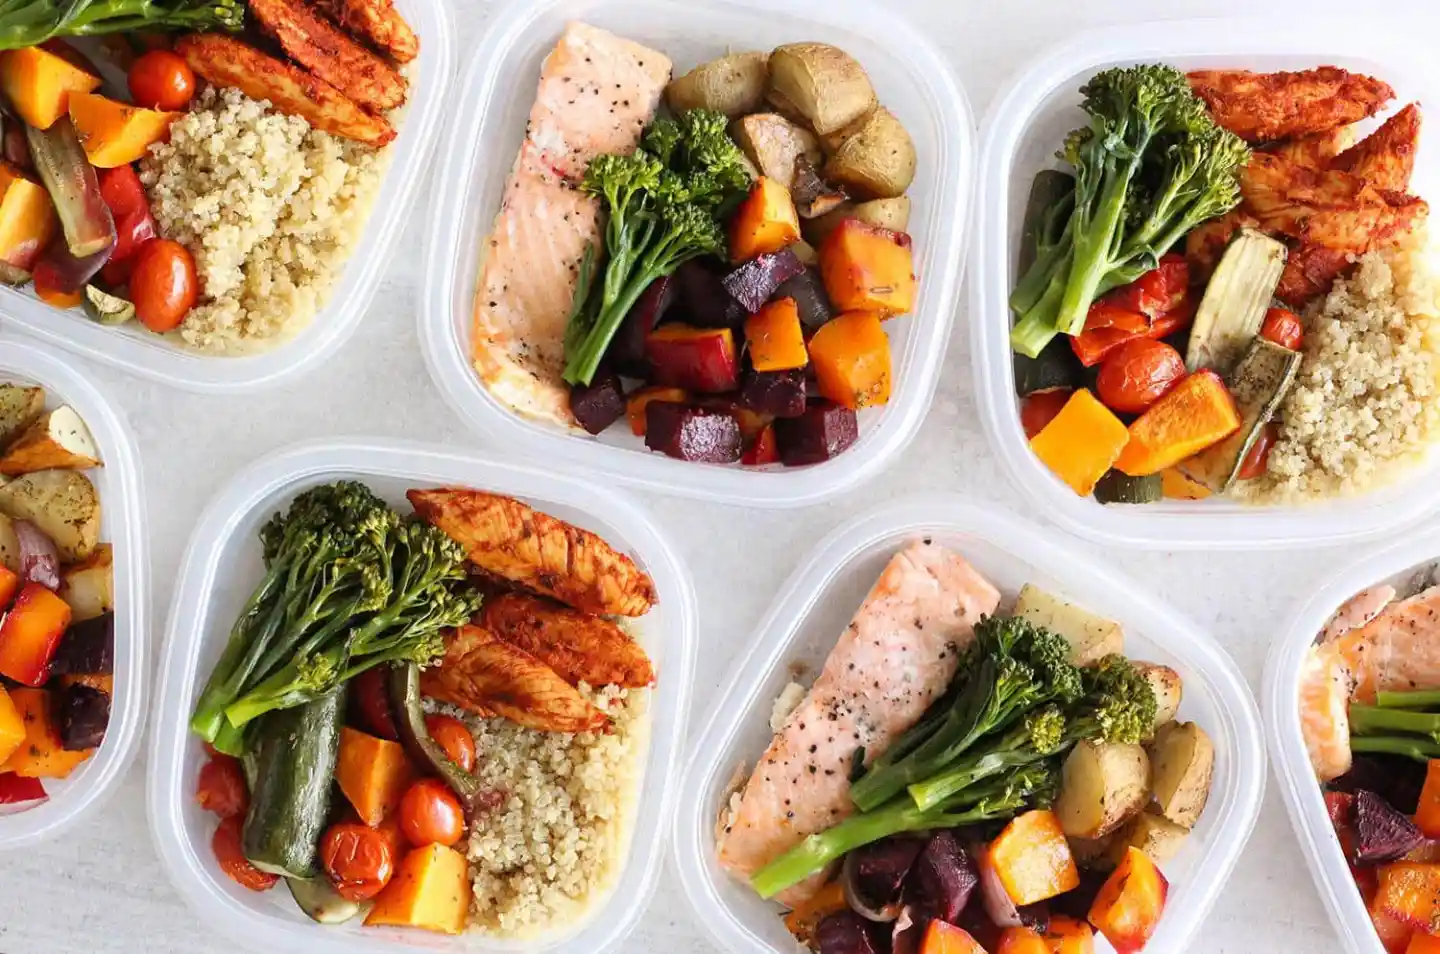
      • Focus on: Fruits, vegetables, lean proteins (chicken, fish, beans, lentils), whole grains (oats, brown rice, quinoa), and healthy fats (avocado, nuts, seeds, olive oil). These foods are rich in nutrients, fiber, and protein, which promote satiety and keep you full longer.
      • Limit: Highly processed foods, sugary drinks, excessive refined carbohydrates (white bread, pastries), and unhealthy trans fats. These often contain empty calories, contribute to sugar spikes, and promote fat storage.
    2. Control Portion Sizes:
      • Even healthy foods can lead to weight gain if consumed in excess. Pay attention to recommended serving sizes.
      • Use smaller plates, measure out servings (especially for calorie-dense foods like nuts or oils), and learn to recognize your body’s hunger and fullness cues.
    3. Increase Protein Intake:
      • Protein is highly satiating and helps preserve muscle mass during weight loss. It also has a higher thermic effect of food (TEF), meaning your body burns more calories digesting protein than fats or carbohydrates.
      • Include a source of lean protein at every meal: chicken breast, fish, eggs, Greek yogurt, tofu, lentils, beans.
    4. Boost Fiber Consumption:
      • Fiber promotes fullness, aids digestion, and can help stabilize blood sugar levels.
      • Found in fruits, vegetables, whole grains, legumes, and nuts. Aim for at least 25-30 grams of fiber per day.
    5. Stay Hydrated:
      • Drink plenty of water throughout the day. Sometimes, thirst is mistaken for hunger.
      • Drinking a glass of water before meals can also help you feel fuller and consume fewer calories. Avoid sugary beverages like soda and fruit juices, which contribute significant empty calories.
    6. Reduce Sugar and Refined Carbohydrates:
      • Added sugars are a major culprit in weight gain. They offer little nutritional value and lead to blood sugar spikes and crashes, increasing cravings.
      • Refined carbohydrates (white bread, pasta, sugary cereals) behave similarly to sugar in the body. Opt for whole-grain alternatives.
    7. Mindful Eating:
      • Eat slowly, savor your food, and pay attention to your body’s signals. Avoid eating in front of screens. This allows your brain time to register fullness, preventing overeating.

    Step 3: Incorporate Regular Physical Activity

    While diet is paramount for weight loss, exercise complements it by burning calories, building muscle, and improving overall health.

    1. Combine Cardiovascular and Strength Training:
      • Cardiovascular (Aerobic) Exercise: Activities like brisk walking, jogging, cycling, swimming, or dancing elevate your heart rate and burn calories. Aim for at least 150 minutes of moderate-intensity aerobic activity per week (e.g., 30 minutes, 5 times a week).
      • Strength Training (Resistance Training): Lifting weights or using bodyweight exercises (e.g., squats, push-ups, planks) builds muscle mass. Muscle burns more calories at rest than fat, boosting your metabolism even when you’re not exercising. Aim for 2-3 strength training sessions per week.
    2. Increase Non-Exercise Activity Thermogenesis (NEAT):
      • NEAT refers to the calories burned through daily activities that are not formal exercise (e.g., walking, fidgeting, standing, taking the stairs).
      • Look for opportunities to move more throughout your day: take the stairs instead of the elevator, walk during phone calls, stand at your desk, park further away.
    3. Find Activities You Enjoy:
      • Consistency is key. Choose activities that you genuinely enjoy, as you’re more likely to stick with them long-term. This could be hiking, playing sports, dancing, or even gardening.

    Step 4: Implement Lifestyle Adjustments for Sustainable Weight Reduction

    Beyond diet and exercise, several lifestyle factors significantly impact weight management.

    1. Prioritize Sleep:
      • Lack of sleep can disrupt hormones that regulate appetite (ghrelin and leptin), leading to increased hunger and cravings for unhealthy foods. Aim for 7-9 hours of quality sleep per night.
    2. Manage Stress:
      • Chronic stress can increase levels of cortisol, a hormone that promotes fat storage, particularly around the abdomen.
      • Incorporate stress-reducing activities like meditation, yoga, deep breathing exercises, spending time in nature, or engaging in hobbies.
    3. Track Progress (But Don’t Obsess):
      • Monitoring your food intake (e.g., using a food diary or app) can help you become aware of your eating habits and identify areas for improvement.
      • Weigh yourself regularly (e.g., once a week at the same time) to track trends, but don’t get discouraged by daily fluctuations. Focus on the long-term trend.
      • Beyond the scale, track non-scale victories like increased energy, improved fitness, better sleep, and clothes fitting better.
    4. Seek Support:
      • Having a support system can make a big difference. Share your goals with friends or family, join a weight loss community, or work with a coach or dietitian.

    Step 5: Be Patient and Persistent

    Weight reduction is not linear. There will be plateaus, setbacks, and times when progress seems slow.

    • Consistency is Key: Adhere to your healthy habits most of the time. Small, consistent efforts add up over time.
    • Learn from Setbacks: Don’t view deviations from your plan as failures. Understand what triggered them, adjust your strategy, and get back on track.
    • Celebrate Small Victories: Acknowledge your progress, no matter how small. This helps maintain motivation.

    Common Pitfalls to Avoid

    • Crash Diets/Extreme Restriction: These are unsustainable, often lead to nutrient deficiencies, muscle loss, and rebound weight gain.
    • Ignoring Liquid Calories: Sugary drinks, specialty coffees, and excessive alcohol can add hundreds of empty calories quickly.
    • Underestimating Portion Sizes: Even healthy foods can lead to excess calories if portions are too large.
    • Lack of Sleep: As mentioned, poor sleep sabotages hormonal balance and increases hunger.
    • Excessive Stress: Can lead to emotional eating and increased fat storage.
    • Setting Unrealistic Expectations: Sustainable weight reduction takes time and consistent effort.

    By adopting these evidence-based strategies—focusing on a balanced diet, regular exercise, adequate sleep, and stress management—you can effectively and sustainably reduce your body weight, leading to a healthier, more energetic, and fulfilling life. Remember, this is a journey, and every small step forward counts.

    Frequently Asked Questions (FAQ)

    Q1: How much weight can I realistically lose in a month?

    A healthy and sustainable rate of weight loss is generally considered to be 1-2 pounds (0.45-0.9 kg) per week. This means you can realistically expect to lose about 4-8 pounds (1.8-3.6 kg) in a month. Losing weight faster than this often involves muscle loss and is harder to sustain long-term.

    Q2: Do I have to cut out all my favorite foods to lose weight?

    No, you don’t have to cut out all your favorite foods. The key is moderation and balance. Restrictive diets are often unsustainable. You can enjoy your favorite treats occasionally, as long as they fit within your overall calorie goals and are balanced with nutrient-dense foods. Focusing on making healthy eating a sustainable lifestyle rather than a temporary diet is crucial.

    Q3: Is exercise more important than diet for weight loss?

    While exercise is vital for overall health and helps burn calories, diet is generally more impactful for weight loss. It’s often said that “you can’t out-exercise a bad diet.” Creating a calorie deficit primarily through dietary changes is usually more effective for shedding pounds. However, the combination of both diet and exercise is the most effective approach for sustainable weight reduction and overall health improvement, as exercise helps preserve muscle mass and boosts metabolism.

    Q4: Why am I not losing weight even if I’m exercising and eating healthy?

    There could be several reasons for a weight loss plateau:

    • Underestimating Calorie Intake: You might be consuming more calories than you think (e.g., larger portions, hidden calories in drinks/snacks).
    • Overestimating Calorie Burn: You might be burning fewer calories during exercise than you assume.
    • Metabolic Adaptation: As you lose weight, your body burns fewer calories at rest (your BMR decreases), requiring further adjustments to your calorie intake or activity.
    • Lack of Sleep or High Stress: These factors can disrupt hormones that regulate appetite and metabolism.
    • Underlying Health Conditions: Certain medical conditions (e.g., thyroid issues) can affect weight loss. Consult your doctor if you suspect this.
    • Muscle Gain: If you’re strength training, you might be gaining muscle while losing fat, leading to no change or even an increase on the scale, but positive changes in body composition. Focus on non-scale victories.

    Q5: What is a calorie deficit?

    A calorie deficit occurs when you consistently consume fewer calories (units of energy from food) than your body burns each day. Your body then has to tap into its stored energy reserves (primarily fat) to make up the difference, leading to weight loss. To lose approximately 1 pound of fat, you need to create a deficit of about 3,500 calories.

  • How to Practice Yoga Everday

    How to Practice Yoga Everday

    The idea of practicing yoga every day might sound daunting, especially with busy modern lives. Visions of long, intense sessions or contorting into impossible poses can deter many. However, a daily yoga practice doesn’t need to be hours long or physically demanding. It’s about consistency, mindfulness, and creating a habit that nurtures your body and mind.

    Yoga is an ancient practice originating in India, dating back over 5,000 years. Its philosophical roots are deep, aiming for a union of mind, body, and spirit. While Western adaptations often focus heavily on the physical postures (asanas), traditional yoga encompasses much more, including pranayama (breathing techniques), meditation, and ethical principles. Throughout history, countless individuals have turned to yoga for its profound benefits, from enhancing physical health to cultivating inner peace. The beauty of yoga lies in its adaptability; it is truly for every body, regardless of age, flexibility, or fitness level.

    This comprehensive “how-to” guide will empower you to establish and maintain a fulfilling daily yoga practice, making it an integral and beneficial part of your life.

    Why Practice Yoga Every Day?

    Consistent daily yoga practice offers a multitude of benefits that accumulate over time:

    • Increased Flexibility: Regular stretching in various poses lengthens muscles and increases range of motion in joints, reducing stiffness and improving overall mobility.
    • Improved Strength and Tone: Holding poses (asanas) engages and strengthens various muscle groups, building lean muscle tone throughout the body.
    • Better Balance: Many yoga poses challenge and improve your sense of balance, which is vital for coordination and preventing falls, especially as you age.
    • Enhanced Respiration and Energy: Pranayama (breathing exercises) improve lung capacity and efficiency, leading to increased oxygen intake, better circulation, and higher energy levels.
    • Stress Reduction: Yoga’s emphasis on breath and mindfulness helps activate the parasympathetic nervous system, reducing stress, anxiety, and promoting relaxation.
    • Mental Clarity and Focus: The meditative aspects of yoga train your mind to stay present, improving concentration, cognitive function, and emotional regulation.
    • Pain Relief: Regular practice can alleviate chronic pain, including lower back pain, headaches, and arthritis, by improving posture, strengthening supporting muscles, and promoting relaxation.
    • Better Sleep: By calming the mind and body, daily yoga can significantly improve sleep quality and address insomnia.
    • Improved Posture: Strengthening core muscles and increasing spinal flexibility naturally leads to better posture.
    • Mind-Body Connection: Yoga fosters a deeper awareness of your body’s sensations and signals, leading to better self-care and intuitive movement.

    Essential Preparations for Daily Yoga Practice

    Setting yourself up for success begins before you even step onto the mat.

    1. Find Your “Why”

    Understanding your motivation is key to building any habit, especially daily yoga.

    • Action: Reflect on why you want to practice yoga every day. Is it for stress relief, increased flexibility, better sleep, mental clarity, or physical strength? Write down your top reasons and keep them in mind. This intrinsic motivation will be your anchor on days when motivation wanes.
    1. Choose Your Time & Duration

    Consistency is more important than duration. Even 10-15 minutes a day is highly effective.

    • Action:
      • Morning Yoga: Many prefer morning practice to set a positive tone for the day. It helps energize the body and sharpen the mind.
      • Evening Yoga: An evening routine can help you unwind, release tension, and prepare for restful sleep.
      • Lunch Break Yoga: A short session can break up your workday and refresh your focus.
      • Set a Realistic Duration: Start small. Aim for 10-20 minutes daily. As you build consistency and strength, you can gradually increase the duration. Five minutes of mindful movement is better than no practice at all.
    • Tip: Block out this time in your calendar just like any other important appointment.
    1. Designate Your Space

    Having a dedicated, inviting space makes it easier to show up.

    • Action:
      • Find a quiet corner in your home where you won’t be disturbed.
      • Ensure there’s enough room to move freely without hitting furniture.
      • Keep your yoga mat and any props (blocks, straps, blankets) easily accessible. Seeing them can serve as a visual reminder.
      • Consider adding elements that enhance relaxation, like dim lighting, a plant, or a scented candle (if safe).
    1. Gather Essential Props (Optional but Helpful)

    While you don’t need anything to start, a few basic yoga props can enhance your practice, particularly for beginners or those working on flexibility.

    • Yoga Mat: Provides cushioning and grip. A good mat is perhaps the most essential item.
    • Yoga Blocks: Versatile for support, deepening stretches, and making poses more accessible (e.g., bringing the floor closer).
    • Yoga Strap: Helps extend your reach in stretches and improve flexibility, especially for hamstrings and shoulders.
    • Blanket: Can be folded for padding under knees or hips, or rolled for support in restorative poses.
    • Comfortable Clothing: Wear clothes that allow for a full range of movement without restriction.
    1. Choose Your Learning Resource

    You don’t need a studio membership to practice daily.

    • Action:
      • Online Classes/Apps: Numerous yoga apps (e.g., Down Dog, Alo Moves, Daily Yoga, Yoga Studio) and YouTube channels (e.g., Yoga With Adriene) offer guided classes for all levels and durations. Many provide customizable practices.
      • Books/Videos: If you prefer self-guided practice, invest in a good yoga book or DVD that demonstrates poses clearly.
      • Local Studio: If your budget allows, occasional in-person classes can provide valuable feedback and deeper instruction from a qualified instructor.

    Building Your Daily Yoga Routine: Step-by-Step

    Here’s how to structure your daily practice, focusing on accessibility and consistency.

    Step 1: Start with Intention and Centering (1-2 minutes)

    Begin by transitioning from your daily activities to your yoga practice.

    • Action:
      • Sit comfortably on your mat (e.g., Easy Pose / Sukhasana).
      • Close your eyes gently or soften your gaze.
      • Bring awareness to your breath, observing its natural rhythm without trying to change it.
      • Set an intention for your practice – whether it’s to find peace, build strength, or simply breathe.

    Step 2: Warm-Up and Gentle Movement (3-5 minutes)

    Prepare your body for deeper stretches and movements.

    • Action:
      • Cat-Cow Pose (Marjaryasana-Bitilasana): On hands and knees, arch your spine on inhale (Cow) and round on exhale (Cat). Great for spinal flexibility. (3-5 rounds)
      • Thread the Needle Pose: From hands and knees, thread one arm under the other armpit, resting on your shoulder, for a gentle shoulder stretch. (30-60 seconds per side)
      • Gentle Neck Rolls or Shoulder Rolls: Release tension in the upper body.

    Step 3: Core Asanas (5-10 minutes)

    Incorporate a few foundational poses that offer full-body benefits.

    • Action (Choose 2-4 poses that feel good for your body):
      • Downward-Facing Dog (Adho Mukha Svanasana): Stretches hamstrings, calves, shoulders; lengthens the spine. Modify by bending knees deeply if hamstrings are tight.
      • Mountain Pose (Tadasana): Seems simple, but focuses on grounding, alignment, and body awareness. Great for recentering.
      • Standing Forward Bend (Uttanasana): Stretches hamstrings and spine, calms the nervous system. Bend knees generously.
      • Cobra Pose (Bhujangasana) or Sphinx Pose: Gentle backbends that strengthen the back and open the chest. Keep elbows close to the body.
      • Low Lunge (Anjaneyasana): Opens hips and stretches the front of the thigh.
      • Bridge Pose (Setu Bandhasana): Strengthens glutes, hamstrings, and back, and opens the chest.
      • Tree Pose (Vrksasana): Improves balance and strengthens ankles and legs. Use a wall for support if needed.
    • Tip: Hold each pose for 3-5 breaths, focusing on alignment and sensation, not perfection. Listen to your body and never push into pain.

    Step 4: Cool-Down and Gentle Stretches (3-5 minutes)

    Slowly bring your heart rate down and relax your muscles.

    • Action:
      • Child’s Pose (Balasana): A restorative and calming pose for the back and hips. Kneel, fold forward, resting forehead on the mat.
      • Supine Spinal Twist: Lie on your back, knees bent, and gently drop knees to one side, then the other, for a gentle spinal release.
      • Happy Baby Pose (Ananda Balasana): Lie on your back, hug knees to chest, grab outer feet, and open knees wider. Gentle hip opener and lower back release.

    Step 5: Savasana (Corpse Pose) and Relaxation (2-5 minutes)

    This is a non-negotiable part of every yoga practice, allowing your body to integrate the benefits of the poses.

    • Action:
      • Lie flat on your back, arms slightly away from your body with palms up, legs relaxed.
      • Close your eyes and allow your body to feel heavy and sink into the mat.
      • Focus on your breath, letting go of any thoughts or tension.
      • Set a timer if needed, but allow yourself to fully relax.

    Maintaining Consistency and Overcoming Challenges

    • Be Flexible with Your Schedule: Some days you might have 30 minutes, others only 10. That’s perfectly fine. A shorter, consistent practice is more beneficial than sporadic long sessions.
    • Listen to Your Body: Yoga is not competitive. Respect your body’s limits, especially if you’re feeling tired or have minor aches. Modify poses or skip them if they cause pain.
    • Don’t Aim for Perfection: Focus on the breath and the feeling in your body, not on achieving a “perfect” pose. Every body is different.
    • Embrace Rest: Restorative poses and Savasana are just as important as active poses.
    • Vary Your Practice: To keep things interesting and work different muscle groups, explore different styles of yoga (e.g., gentle Hatha, flowing Vinyasa, calming Yin) or try different online instructors.
    • Track Your Progress: Notice how your flexibility, strength, mood, or sleep improves over time. This can be a great motivator.
    • Journaling: After your practice, take a moment to jot down how you feel. This helps reinforce the positive impact.
    • Join a Community: Whether online or in-person, connecting with other yogis can provide support and inspiration.

    Practicing yoga every day is a journey, not a destination. By integrating even short, mindful sessions into your routine, you’ll unlock profound physical, mental, and emotional benefits that enrich your entire life.

    Frequently Asked Questions (FAQ)

    Q1: How long should I practice yoga every day as a beginner?

    As a beginner, even 10-15 minutes of yoga every day is highly beneficial. Consistency is more important than duration. You can gradually increase your practice time as you build strength, flexibility, and comfort.

    Q2: Do I need to be flexible to start practicing yoga daily?

    Absolutely not! This is one of the most common yoga myths. Flexibility is a result of practicing yoga, not a prerequisite. There are modifications for every pose, and you’ll find that your flexibility will naturally improve with consistent practice.

    Q3: What type of yoga is best for daily practice at home?

    For daily practice at home, especially for beginners, Hatha yoga and Vinyasa flow are great starting points.

    • Hatha Yoga: Focuses on holding poses for longer, emphasizing alignment and breath. It’s slower-paced and good for learning fundamentals.
    • Vinyasa Flow: Links breath with movement in a flowing sequence. You can find gentle Vinyasa suitable for daily practice.
    • Restorative Yoga / Yin Yoga: Excellent for days when you need deep relaxation and passive stretching.

    Q4: Can daily yoga help with stress and anxiety?

    Yes, daily yoga practice is highly effective for stress relief and reducing anxiety. The combination of physical postures, pranayama (breathing techniques), and meditation helps calm the nervous system, lower cortisol levels, and promote a sense of well-being and mental clarity.

    Q5: What if I miss a day of practice?

    It’s perfectly normal to miss a day. Don’t let it derail your entire routine. The key is to get back on the mat the next day. A missed day is an opportunity to recommit, not a reason to quit. Consistency over perfection is the goal.

    Q6: Do I need special equipment to practice yoga at home?

    The most essential piece of equipment is a yoga mat for cushioning and grip. Beyond that, yoga props like blocks and straps are highly recommended for beginners to assist with poses and deepen stretches, but they are not strictly necessary to start. Comfortable clothing that allows free movement is also important.

    Q7: Can I practice yoga if I have an injury or specific health condition?

    If you have an injury or a specific health condition, it is crucial to consult with your doctor or a physical therapist before starting any new exercise routine, including yoga. Inform your yoga instructor (if taking classes) or choose online resources that offer modifications for various conditions. Listen to your body and avoid any movements that cause pain.

  • How to get 8 Hours of Sleep

    How to get 8 Hours of Sleep

    In our fast-paced world, consistently getting enough sleep can feel like a luxury. But the truth is, it’s a non-negotiable foundation for good health. For most adults—myself included—shooting for at least 8 hours a night is key to physical recovery, mental sharpness, emotional stability, and just…feeling like yourself. When we don’t get enough, everything suffers: focus drops, moods swing, immunity weakens, and the risk of chronic illness inches up.

    Now, simply lying in bed for 8 hours isn’t the same as getting quality sleep. That part requires some intention. The guide below lays out a straightforward, step-by-step way to level up your sleep hygiene and actually reach that well-rested state night after night.

    Step 1: Establish a Consistent Sleep Schedule

    Your body likes rhythm. It’s wired for it. So, when you stick to the same sleep and wake times every day (yes, even on weekends), you help reinforce your internal body clock—your circadian rhythm.

    1. Figure Out Your Ideal Bedtime: Start with your wake-up time and work backward. Need to be up at 7:00 AM? Aim to be asleep by 11:00 PM.
    2. Stick With It: The more regular your schedule, the more your body catches on, making it easier to doze off and wake up without an alarm.
    3. Make Small Shifts: If your current routine is way off, don’t overhaul it overnight. Adjust in 15-30 minute increments until you land where you need to be.

    Step 2: Optimize Your Sleep Environment

    Where you sleep makes a big difference in how well you sleep. A few tweaks can go a long way.

    1. Darken the Room:
      • Block light with blackout curtains or shades.
      • Cover up or unplug any glowing LEDs.
    2. Cool It Down:
      • The sweet spot is generally 18-22°C (65-72°F).
      • Use breathable sheets and a mattress that doesn’t trap heat.
    3. Quiet Matters:
      • Try earplugs, white noise machines, or fans to mask disruptive sounds.
      • If racing thoughts are the issue, journaling before bed might help.
    4. Comfort Counts:
      • A supportive mattress and pillow setup can make all the difference.
      • A clean, uncluttered space can help your mind unwind.

    Step 3: Develop a Relaxing Bedtime Routine

    Wind down with purpose. Having a regular pre-sleep ritual helps tell your body it’s time to shift gears. Aim to start about 30-60 minutes before lights out.

    1. Dim the Lights: Lower lighting throughout your home an hour or two before bed.
    2. Unplug from Screens:
      • Shut down electronics at least 1-2 hours before sleep. Blue light delays melatonin release.
      • If screens are unavoidable, use night mode or wear blue light blocking glasses.
    3. Try Calming Activities:
      • A warm bath or shower.
      • Reading a paper book.
      • Gentle stretching, yoga, or breathwork.
      • Listening to soothing music or a low-key podcast.

    Step 4: Manage Diet and Stimulants

    What you eat and drink affects your sleep more than you might think.

    1. Ease Off Caffeine:
      • Cut off coffee, tea, soda, chocolate, and energy drinks 6-8 hours before bed.
    2. Rethink Alcohol:
      • Sure, it might make you sleepy at first, but it messes with REM sleep and can lead to fragmented rest later.
    3. Lighten Up Late Meals:
      • Avoid heavy, rich, or spicy meals close to bedtime to prevent discomfort.
      • Try to finish eating 2-3 hours before hitting the hay.
    4. Hydrate Smartly:
      • Drink plenty during the day, but taper off in the evening to avoid bathroom wake-ups.

    Step 5: Incorporate Daytime Habits for Better Sleep

    Good sleep starts when you wake up. What you do during the day sets the tone for your nights.

    1. Move Your Body:
      • Aim for regular physical activity—most days of the week if you can.
      • Just skip the late-night HIIT sessions; they can be too stimulating.
    2. Soak Up Natural Light:
      • Morning sunlight helps regulate your circadian rhythm and improves alertness.
    3. Nap Wisely:
      • Keep naps short (20-30 minutes) and early in the afternoon. Long or late naps can mess with nighttime sleep.
    4. Tame the Stress:
      • Chronic stress wrecks sleep. Practice mindfulness, journaling, or breathing exercises throughout the day.
      • Jot down worries earlier in the evening so you’re not carrying them into bed.

    Step 6: Monitor Your Progress and Be Patient

    Sleep improvement doesn’t happen overnight—literally. Give it time.

    • Keep a Sleep Diary: Track your patterns to spot what’s working and what isn’t.
    • Stay Consistent: That’s the magic word. Habits take time to stick.
    • Listen to Your Body: Be open to adjusting things based on how you actually feel.

    If you’ve tried all of this and still find yourself tossing and turning, or suspect something deeper (like sleep apnea or chronic insomnia), don’t hesitate to reach out to a healthcare provider or sleep specialist. Sometimes a bit of professional insight makes all the difference.

    Frequently Asked Questions (FAQ)

    Q1: How much sleep do adults really need? Is 8 hours a magic number?

    Eight hours is a helpful benchmark, but it’s not one-size-fits-all. Most adults need somewhere between 7 and 9 hours. The real test? Waking up refreshed, alert, and not desperately needing caffeine to function.

    Q2: Can exercising too close to bedtime affect my sleep?

    It sure can. Vigorous exercise revs up your body temperature and nervous system. That stimulation can delay sleep. Try to finish workouts at least 3-4 hours before bed. Lighter movements like stretching or slow yoga are usually fine.

    Q3: How does blue light affect my sleep, and what can I do about it?

    Blue light suppresses melatonin production, which messes with your circadian rhythm. Avoid screens 1-2 hours before bed, use night mode, or consider blue light glasses.

    Q4: Does alcohol help me sleep better?

    Not really. It may knock you out initially, but it fragments your sleep and cuts into REM, the stage important for memory and mood. It also increases nighttime bathroom trips.

    Q5: What is “sleep hygiene,” and how does it relate to getting 8 hours of sleep?

    leep hygiene is the term for all the healthy sleep habits we’ve discussed—routine, environment, diet, and stress management. Nail those down, and you’re setting yourself up for not just more sleep, but better sleep.

  • How to Body Recomposition and be Jacked

    How to Body Recomposition and be Jacked

    Achieving body recomposition means simultaneously building muscle and losing body fat. This is often considered the “holy grail” of fitness for many, leading to a leaner, stronger, and more aesthetically pleasing physique often described as “jacked.” While challenging, it’s a highly achievable goal with the right strategy and consistent effort. It’s a more sustainable approach than extreme bulking and cutting cycles for many individuals.

    Understanding Body Recomposition

    Unlike traditional weight loss (where the goal is solely to reduce total body weight, which can include muscle) or bulking (where the goal is to gain weight, often including significant fat), body recomposition focuses on altering your body’s composition. Your weight on the scale might stay relatively the same, decrease slightly, or even increase slightly, but your body fat percentage will decrease while your lean muscle mass increases. This leads to a denser, more defined look.

    Key principles for successful body recomposition:

    • Calorie Management: Not a huge surplus or deficit, but often around maintenance or a slight deficit/surplus depending on starting point.
    • High Protein Intake: Critical for muscle protein synthesis and satiety.
    • Effective Resistance Training: The primary stimulus for muscle growth.
    • Strategic Cardio: To aid fat loss without hindering muscle gain.
    • Adequate Recovery: Essential for muscle repair and growth.
    • Patience and Consistency: Recomposition is a slow, gradual process.

    Step 1: Master Your Nutrition – The Foundation

    Nutrition is arguably the most critical component of body recomposition. You need to fuel muscle growth while encouraging fat loss.

    1. Calorie Intake: Maintenance or Slight Adjustment
    • Determine Maintenance Calories: Use an online Total Daily Energy Expenditure (TDEE) calculator as a starting point. This estimates the calories your body burns in a day. You can also track your food intake and weight over 1-2 weeks to get a more accurate personal estimate.
    • For Body Recomposition:
      • Beginners or higher body fat %: Aim for a slight caloric deficit (e.g., 10-15% below TDEE). This is often the most effective starting point as your body can more readily tap into fat stores for energy while building muscle.
      • Experienced lifters or lower body fat %: Aim for maintenance calories or a slight caloric surplus (e.g., 5-10% above TDEE, often called “lean bulking”). This provides more energy for muscle growth while minimizing fat gain, though progress might be slower.
      • Calorie Cycling (Advanced): Some individuals cycle calories, consuming a slight surplus on training days and a slight deficit on rest days. This can optimize fuel for workouts and recovery while promoting fat loss on off days.
    • Track Consistently: Use a food tracking app (e.g., MyFitnessPal, Cronometer) to monitor your intake, at least initially, to ensure you’re hitting your targets.
    1. Prioritize Protein Intake: The Muscle Builder

    Protein is crucial for muscle protein synthesis (MPS), satiety, and preserving lean mass during fat loss.

    • Target: Aim for 1.6 to 2.2 grams of protein per kilogram of body weight (or roughly 0.7 to 1 gram per pound of body weight). For a person weighing 70 kg (154 lbs), this would be 112-154g of protein daily.
    • Sources: Focus on lean protein sources:
      • Chicken breast, turkey, lean beef, fish (salmon, cod, tuna).
      • Eggs, Greek yogurt, cottage cheese.
      • Legumes, tofu, tempeh (plant-based).
      • Whey or casein protein supplements (convenient way to hit targets).
    • Distribute Evenly: Try to spread your protein intake throughout the day (e.g., 20-40g per meal/snack) to optimize MPS.
    1. Carbohydrates and Fats: Fuel and Hormones

    Once protein is set, adjust carbs and fats based on your energy needs and preferences.

    • Carbohydrates:
      • Fuel for Workouts: Carbs are your body’s primary fuel source for intense resistance training. Don’t drastically cut them.
      • Timing: Consume a good portion of your carbs around your workouts (pre- and post-workout) to fuel performance and aid recovery.
      • Sources: Whole grains (oats, brown rice, quinoa), fruits, vegetables, potatoes, sweet potatoes.
    • Fats:
      • Essential for Hormones: Fats are vital for hormone production (including testosterone), nutrient absorption, and overall health.
      • Target: Aim for 20-30% of your total daily calories from healthy fats.
      • Sources: Avocados, nuts, seeds, olive oil, fatty fish (salmon).

    Step 2: Implement Effective Resistance Training – The Stimulus

    Resistance training is the primary driver of muscle growth (hypertrophy). Without it, you cannot recomposition effectively.

    1. Focus on Progressive Overload

    The most critical principle for muscle growth is progressive overload. This means continuously challenging your muscles to do more than they’ve done before.

    • Increase Weight: Lift heavier weights over time.
    • Increase Reps/Sets: Perform more repetitions or sets with the same weight.
    • Increase Frequency: Train a muscle group more often (within reason for recovery).
    • Improve Form: Better technique allows for greater muscle activation and less injury risk.
    • Decrease Rest Times: Reduce rest between sets (can increase intensity).
    • Time Under Tension: Control the eccentric (lowering) and concentric (lifting) phases of the movement.
    1. Structure Your Workouts
    • Frequency: Aim to train each major muscle group 2-3 times per week. A full-body routine, upper/lower split, or push/pull/legs (PPL) split are all effective.
    • Exercise Selection:
      • Compound Movements: Prioritize exercises that work multiple muscle groups simultaneously (e.g., squats, deadlifts, bench press, overhead press, rows). These are highly effective for building overall strength and muscle mass.
      • Isolation Movements: Supplement with isolation exercises (e.g., bicep curls, tricep extensions, lateral raises) to target specific muscles and improve symmetry.
    • Rep Ranges: For hypertrophy, aim for 6-12 repetitions per set for most exercises, pushing close to failure (the point where you can’t perform another rep with good form).
    • Volume: Around 10-20 working sets per muscle group per week is a good starting point for most.
    • Consistency: Show up and put in the work, week after week.

    Step 3: Integrate Strategic Cardiovascular Exercise

    While not the primary driver of fat loss in recomposition (nutrition is), strategic cardio can support your goals.

    • Type:
      • Low-Intensity Steady State (LISS): Walking, light cycling. Good for increasing daily energy expenditure without hindering recovery from resistance training. Aim for 30-60 minutes, 3-5 times per week.
      • High-Intensity Interval Training (HIIT): Short bursts of intense activity followed by rest. Time-efficient for fat burning, but can be more taxing on recovery. Limit to 1-2 sessions per week, ideally on separate days from heavy lifting.
    • Purpose: Cardio helps create a calorie deficit, improves cardiovascular health, and can enhance recovery by improving blood flow.
    • Don’t Overdo It: Excessive cardio can interfere with muscle growth, especially in a calorie deficit. Use it as a tool, not the main strategy.

    Step 4: Prioritize Recovery – The Growth Phase

    Muscle isn’t built in the gym; it’s built during recovery. Neglecting recovery will sabotage your efforts.

    1. Sleep Quality and Quantity
    • Target: Aim for 7-9 hours of high-quality sleep per night.
    • Benefits: Sleep is when your body repairs muscle tissue, releases growth hormones, and replenishes energy stores. Poor sleep can impair muscle growth and fat loss.
    • Improve Sleep Hygiene: Create a cool, dark, quiet bedroom; avoid screens before bed; establish a consistent sleep schedule.
    1. Stress Management
    • Cortisol: Chronic stress elevates cortisol levels, a hormone that can promote fat storage (especially around the midsection) and muscle breakdown.
    • Strategies: Incorporate stress-reducing activities like meditation, yoga, hobbies, or spending time in nature.
    1. Rest Days
    • Crucial: Don’t train every day. Schedule rest days to allow your muscles to recover and rebuild. Active recovery (light walking, stretching) can be beneficial on some rest days.

    Step 5: Track Progress and Be Patient

    Body recomposition is a marathon, not a sprint. Changes are gradual but cumulative.

    1. Track Key Metrics
    • Body Composition:
      • Measurements: Take circumference measurements (waist, chest, arms, thighs) every 2-4 weeks.
      • Photos: Take progress photos (front, side, back) every 4-8 weeks in similar lighting and poses. This is often the most motivating way to see changes.
      • Body Fat %: If possible, get a professional body fat assessment (DEXA scan, BIA, calipers) every few months for a more accurate picture, but don’t obsess over daily fluctuations.
    • Performance:
      • Workout Log: Track your lifts (weight, sets, reps) in a notebook or app. Strive for small improvements (progressive overload).
    • Weight: Weigh yourself 2-3 times per week at the same time (e.g., first thing in the morning after using the bathroom) and take an average. Don’t be discouraged if the scale doesn’t move much; it indicates recomposition is occurring.
    1. Adjust and Adapt
    • Review Progress: Every 4-6 weeks, assess your progress based on all metrics.
    • Make Adjustments:
      • No progress in muscle or fat loss: Adjust calories (e.g., slightly lower if fat loss is stalled, slightly higher if muscle gain is stalled).
      • Stalled strength: Review your training program for progressive overload, ensure adequate recovery.
    • Consistency is Key: The biggest predictor of success is adherence to the plan over the long term.

    Getting jacked through body recomposition is a rewarding journey that emphasizes sustainable habits and a holistic approach to fitness. By focusing on smart nutrition, effective training, and robust recovery, you can sculpt the physique you desire.

    FAQ: How to Body Recomposition and Be Jacked

    Q1: What is body recomposition?

    Body recomposition is a fitness strategy that focuses on simultaneously building muscle mass and losing body fat, leading to a positive change in your overall body composition. Unlike traditional dieting or bulking, your total body weight might remain stable, but your body will look leaner, more defined, and stronger. The goal is to reduce your body fat percentage while increasing your lean muscle mass.

    Q2: Is body recomposition possible for everyone?

    Body recomposition is most efficient and noticeable for:

    • Beginners: Those new to resistance training.
    • Individuals with higher body fat percentages: They have more fat to lose, and their bodies can more easily partition energy towards muscle growth.
    • Individuals returning to training after a break.
    • It’s more challenging, but still possible (albeit slower), for experienced lifters with lower body fat percentages.

    Q3: How important is protein for body recomposition?

    Protein is extremely important, arguably the most critical macronutrient for body recomposition. It is essential for muscle protein synthesis (MPS), which is the process of building and repairing muscle tissue. A high protein intake also helps preserve lean muscle mass during periods of caloric deficit and keeps you feeling satiated, which is crucial for managing calorie intake. Aim for 1.6 to 2.2 grams of protein per kilogram of body weight.

    Q4: Do I need to be in a calorie deficit to recomposition?

    Not necessarily a strict deficit for everyone.

    • For beginners or those with higher body fat, a slight caloric deficit (e.g., 10-15% below maintenance) is often most effective for accelerating fat loss while still allowing for muscle gain.
    • For more advanced individuals or those with lower body fat, aiming for maintenance calories or even a slight surplus (e.g., 5-10% above maintenance, often called “lean bulking”) can be more effective to ensure sufficient energy for muscle growth, minimizing fat gain.

    Q5: How long does it take to see results from body recomposition?

    Body recomposition is a slow and gradual process that requires patience and consistency. You might start seeing noticeable changes in your physique (e.g., more definition, clothes fitting differently) within 8-12 weeks, but significant transformations can take 6 months to a year or even longer. Tracking progress with photos and measurements (rather than just the scale) is key to staying motivated.

  • How to Build a Meditation Habit

    How to Build a Meditation Habit

    Building a meditation habit can seem daunting, but it’s a powerful path to reducing stress, improving focus, and cultivating inner peace. A habit is a routine or behavior performed regularly, often unconsciously. In the context of meditation, forming a habit means integrating this practice into your daily life so consistently that it becomes second nature. This guide will walk you through the process, step by step, making it accessible for everyone.

    Meditation is an ancient practice, with roots tracing back thousands of years across various cultures and religions, notably Buddhism and Hinduism. At its core, meditation involves training your mind to achieve a state of relaxed awareness. While there are many forms, the most widely practiced in the West is mindfulness meditation, which focuses on bringing your attention to the present moment without judgment. Research has increasingly shown the tangible benefits of regular meditation, from reducing anxiety and depression to improving sleep and even changing brain structure.

    Why Build a Meditation Habit?

    Before diving into the “how,” understanding the “why” can be a strong motivator. Regular meditation can:

    • Reduce stress and anxiety.
    • Improve emotional regulation.
    • Enhance self-awareness.
    • Increase focus and attention span.
    • Promote better sleep.
    • Foster compassion and empathy.

    These benefits don’t appear overnight, but consistent practice builds them over time, making the effort worthwhile.

    Step 1: Start Small and Simple

    The biggest mistake beginners make is aiming for long, intense sessions. This often leads to burnout and giving up.

    • Begin with 5 minutes: Don’t try to meditate for 30 minutes on your first day. Start with just 5 minutes. Even 2-3 minutes is better than nothing. The goal here is consistency, not duration.
    • Choose a consistent time: Our brains love routines. Pick a time of day that works best for you and stick to it.
      • Morning: Many find meditating first thing in the morning sets a positive tone for the day.
      • Lunch break: A quick session can reset your focus.
      • Evening: Before bed can help with relaxation and sleep.
    • Find a quiet space: While you can meditate anywhere, having a dedicated, quiet spot free from distractions helps. This could be a specific chair, a corner of your room, or even a mat.
    • Comfortable posture: You don’t need to sit cross-legged on the floor. A chair with your feet flat on the ground and your back straight is perfectly fine. The key is to be alert but relaxed.

    Step 2: Choose Your Meditation Technique

    There are various types of meditation, but for beginners, focusing on your breath is the most common and effective starting point.

    • Focus on the Breath (Anapanasati):
      1. Sit comfortably with your back straight but not rigid.
      2. Close your eyes gently or soften your gaze downwards.
      3. Bring your attention to your breath. Notice the sensation of air entering and leaving your body – perhaps at your nostrils, in your chest, or your abdomen.
      4. You don’t need to control your breath; just observe it as it naturally is.
      5. Your mind will wander. This is normal. When you notice your mind has strayed, gently bring your attention back to your breath without judgment. Think of your thoughts like clouds passing by; acknowledge them, then let them go.
    • Body Scan Meditation: This involves systematically bringing your attention to different parts of your body, noticing any sensations without trying to change them. This can be particularly good for grounding and releasing tension.

    Step 3: Be Prepared for Your Mind to Wander (and That’s Okay!)

    One of the most common misconceptions about meditation is that you need to empty your mind of all thoughts. This is not the goal, especially for beginners.

    • Thoughts are normal: Your mind is designed to think. Expect thoughts to arise during meditation.
    • Gentle redirection: The practice isn’t about stopping thoughts, but about noticing them and gently bringing your attention back to your chosen anchor (like your breath). Each time you notice your mind has wandered and you bring it back, you’re strengthening your mental “muscle” of attention. This is the core exercise of meditation.
    • No judgment: Don’t get frustrated with yourself if your mind wanders a lot. This is part of the process. Treat yourself with kindness and patience.

    Step 4: Leverage Tools and Resources

    While you don’t need anything to meditate, certain tools can be incredibly helpful for beginners in building a consistent habit.

    • Meditation Apps:
      • Calm: Offers guided meditations for various purposes (sleep, stress, focus).
      • Headspace: Provides structured courses for beginners, breaking down concepts clearly.
      • Insight Timer: Features a vast library of free guided meditations and a simple timer for unguided sessions.
      • Balance: Personalized meditation program that adapts to your needs.
    • Timers: A simple kitchen timer or a meditation app’s timer can help you stick to your chosen duration without constantly checking the clock.
    • Online Communities: Engaging with online forums (like Reddit’s r/meditation) or social media groups can provide support, answer questions, and offer motivation. Hearing about others’ experiences can normalize your own challenges.

    Step 5: Overcome Common Challenges

    Building a habit isn’t always smooth sailing. Anticipate and prepare for common hurdles.

    • “I don’t have time”: Even 5 minutes counts. Schedule it like an important appointment. Remember, meditation helps you create more effective time by improving focus.
    • “My mind is too busy”: This is why you meditate! The practice helps calm a busy mind over time. Don’t let a busy mind deter you; see it as an opportunity for practice.
    • “I fall asleep”: If this happens, you might be too relaxed, or your posture isn’t alert enough. Try meditating in a more upright position or splashing some water on your face before starting.
    • “I don’t feel anything”: Meditation isn’t always about dramatic experiences. The subtle benefits accumulate over time. The “feeling” isn’t the goal; consistent practice is.
    • “I skipped a day”: Don’t give up! Habit formation isn’t about perfection. If you miss a day, just get back on track the next. The “never miss twice” rule is powerful for habit building. Consistency is more important than intensity.

    Step 6: Stick With It and Be Patient

    Building a lasting habit takes discipline and patience.

    • Be patient: It can take weeks or even months for a new behavior to become deeply ingrained. Some research suggests it takes an average of 66 days for a new habit to form.
    • Track your progress: Mark off days on a calendar or use a habit-tracking app. Seeing your streak grow can be incredibly motivating.
    • Be kind to yourself: There will be days when it feels difficult or you just don’t want to do it. Acknowledge that feeling, but gently encourage yourself to sit for your chosen few minutes.
    • Celebrate small wins: Acknowledge your efforts, even for showing up for 5 minutes. Every session builds momentum.

    By following these steps, you can successfully build a meditation habit and unlock its profound benefits for a calmer, more focused, and more balanced life. The journey begins with a single breath.


    FAQ Section

    Q1: How long does it take to build a meditation habit? A1: While individual experiences vary, studies suggest it takes an average of 66 days for a new behavior to become automatic. Consistent daily practice, even for short periods, is key.

    Q2: Is guided meditation better than unguided for beginners?

    For beginners, guided meditations are often highly recommended. They provide instructions and help you stay focused, making the initial experience less overwhelming and more accessible. As you progress, you might transition to unguided practice.

    Q3: What if I can’t clear my mind during meditation?

    The goal of meditation is not to clear your mind. It’s about observing your thoughts without judgment and gently returning your attention to your chosen anchor (like your breath). A busy mind is normal, especially when you start. The practice is in the returning of attention.

    Q4: What’s the best time of day to meditate?

    The best time to meditate is the time that you can consistently stick to. Many find mornings effective for setting the day’s tone, while others prefer evenings for winding down. Experiment to find what works for your schedule and energy levels.

    Q5: Can meditation help with sleep problems?

    Yes, meditation can significantly help with sleep problems. Regular practice, particularly mindfulness and body scan meditations, can reduce stress and anxiety, which are common causes of insomnia, and help calm the nervous system, preparing your body for rest.

    Q6: Do I need special equipment to meditate?

    No, you don’t need any special equipment. A quiet space and a comfortable place to sit (a chair, cushion, or mat) are sufficient. While props like meditation cushions can enhance comfort, they are not essential.

  • How be Mentally Strong and Fit

    How be Mentally Strong and Fit

    In our fast-paced world, while physical fitness is often prioritized, mental strength and fitness are equally, if not more, crucial for navigating life’s challenges, maintaining well-being, and achieving our goals. Being mentally strong doesn’t mean you never feel stressed, sad, or overwhelmed; it means you possess the tools and resilience to manage these emotions, bounce back from adversity, and maintain a positive outlook.

    This guide will provide a comprehensive, step-by-step approach to cultivate mental strength and fitness, empowering you to thrive in any circumstance.

    What Does it Mean to Be Mentally Strong and Fit?

    Mental strength and fitness refer to the capacity to:

    • Manage Emotions: Effectively regulate feelings like stress, anxiety, anger, and sadness.
    • Build Resilience: Bounce back from setbacks, failures, and difficult experiences.
    • Maintain Focus: Concentrate on tasks and goals despite distractions.
    • Adapt to Change: Navigate transitions and uncertainty with flexibility.
    • Think Rationally: Avoid spiraling into negative thought patterns.
    • Set Healthy Boundaries: Protect your time, energy, and emotional well-being.
    • Seek Support: Recognize when you need help and be willing to ask for it.

    It’s not about being emotionless or invulnerable, but about developing healthy coping mechanisms and thought patterns.

    Step 1: Understand Your Mindset and Thought Patterns

    The foundation of mental strength lies in understanding how you think.

    1. Identify Negative Self-Talk: Pay attention to the recurring negative thoughts you have about yourself, others, or situations. Are you overly critical, pessimistic, or prone to catastrophizing?
      • Action: Keep a thought journal for a few days, noting down negative thoughts and the situations that trigger them.
    2. Challenge Cognitive Distortions: These are irrational ways of thinking that can lead to negative emotions. Examples include:
      • All-or-nothing thinking: Seeing things in black and white.
      • Overgeneralization: Drawing broad negative conclusions from a single event.
      • Catastrophizing: Expecting the worst possible outcome.
      • Personalization: Blaming yourself for everything.
      • Action: When you catch a negative thought, ask yourself: “Is this thought truly factual? What’s another way to look at this? What would I tell a friend in this situation?”
    3. Practice Gratitude: Shifting focus to positive aspects of your life can rewire your brain.
      • Action: Each day, list 3-5 things you are grateful for, no matter how small. This can be done verbally, in a journal, or mentally.

    Step 2: Cultivate Emotional Regulation

    Learning to manage your emotions effectively is a cornerstone of mental fitness.

    1. Acknowledge and Validate Emotions: Don’t suppress or judge your feelings. Allow yourself to feel them without letting them consume you.
      • Action: When a strong emotion arises, identify it (“I feel angry,” “I feel anxious”). Breathe deeply and tell yourself, “It’s okay to feel this.”
    2. Practice Deep Breathing Techniques: This helps calm your nervous system.
      • Action: Try 4-7-8 breathing: Inhale for 4 counts, hold for 7, exhale for 8. Repeat several times.
    3. Develop Healthy Coping Mechanisms: Instead of unhealthy habits (e.g., excessive scrolling, overeating), find constructive ways to deal with stress.
      • Action: Identify activities that genuinely relax or uplift you: listening to music, reading, spending time in nature, talking to a supportive friend, light exercise. Create a “Coping Toolkit” list you can refer to.

    Step 3: Build Resilience and Adaptability

    Resilience isn’t avoiding hardship, but effectively recovering from it.

    1. Embrace Challenges as Growth Opportunities: View setbacks as chances to learn and develop, rather than insurmountable obstacles.
      • Action: After a failure, reflect: “What did I learn from this? How can I apply this lesson next time? What strengths did I discover in myself?”
    2. Set Realistic Expectations: Perfectionism can lead to burnout. Understand that not everything will go perfectly.
      • Action: Practice self-compassion. Treat yourself with the same kindness and understanding you would offer a good friend facing a challenge.
    3. Focus on What You Can Control: Dwell on what’s within your power to change, rather than what’s beyond it.
      • Action: For any stressful situation, draw a mental line: “What’s on my side (control)? What’s on the other side (no control)?” Direct your energy to the former.
    4. Develop Problem-Solving Skills: Approach problems systematically rather than being overwhelmed.
      • Action: Break down large problems into smaller, manageable steps. Brainstorm solutions, evaluate pros and cons, and then take action.

    Step 4: Prioritize Self-Care and Healthy Habits

    Your physical health significantly impacts your mental health.

    1. Ensure Adequate Sleep: Lack of sleep severely impairs cognitive function and emotional regulation.
      • Action: Aim for 7-9 hours of quality sleep per night. Establish a consistent sleep schedule and a relaxing bedtime routine.
    2. Maintain a Balanced Diet: Nutritional deficiencies can affect mood and energy levels.
      • Action: Focus on whole, unprocessed foods. Limit sugar, caffeine, and highly processed items.
    3. Engage in Regular Physical Activity: Exercise is a powerful mood booster and stress reducer.
      • Action: Find an activity you enjoy and aim for at least 30 minutes of moderate exercise most days of the week.
    4. Practice Mindfulness and Meditation: These techniques train your mind to stay present and reduce rumination.
      • Action: Start with 5-10 minutes of guided meditation daily using apps like Calm or Headspace, or simply focus on your breath.
    5. Limit Exposure to Negativity: Be mindful of news, social media, and people that drain your energy.
      • Action: Unfollow toxic accounts, take news breaks, and set boundaries with consistently negative individuals.

    Step 5: Build a Strong Support System and Set Boundaries

    Human connection and healthy boundaries are vital for mental well-being.

    1. Nurture Relationships: Spend time with people who uplift and support you.
      • Action: Actively reach out to friends and family. Schedule regular social interactions that bring you joy.
    2. Learn to Say No: Protect your time and energy from commitments that don’t serve you.
      • Action: Practice politely declining requests that overextend you. Understand that “no” is a complete sentence.
    3. Seek Professional Support When Needed: Mental health professionals can provide invaluable tools and guidance.
      • Action: If you feel persistently overwhelmed, sad, anxious, or unable to cope, don’t hesitate to reach out to a therapist, counselor, or psychiatrist. There is no shame in seeking help.
    4. Give Back: Helping others can provide a sense of purpose and boost your own well-being.
      • Action: Volunteer, help a friend, or offer support in your community.

    Step 6: Set Meaningful Goals and Celebrate Progress

    Having a sense of purpose and acknowledging your achievements fuels mental strength.

    1. Set SMART Goals: Make your goals Specific, Measurable, Achievable, Relevant, and Time-bound.
      • Action: Break down big goals into smaller, manageable steps. Focus on the process, not just the outcome.
    2. Practice Self-Reflection: Regularly review your progress, learn from mistakes, and recognize your strengths.
      • Action: Set aside time each week to reflect on what went well, what was challenging, and what you learned.
    3. Celebrate Small Victories: Acknowledge your efforts and achievements, no matter how minor.
      • Action: Give yourself credit for overcoming challenges and reaching milestones. Positive reinforcement boosts motivation and self-esteem.

    Becoming mentally strong and fit is a continuous journey, not a destination. It involves consistent effort, self-awareness, and a commitment to nurturing your mind just as you would your body. By integrating these strategies into your daily life, you can build a robust mental foundation that equips you to handle life’s inevitable ups and downs with grace, resilience, and a profound sense of inner peace.

  • How to Practice Intermating Fasting For Weight Loss

    How to Practice Intermating Fasting For Weight Loss

    Intermittent fasting (IF) is a popular eating pattern that cycles between periods of eating and voluntary fasting. It’s not a diet in the traditional sense, but rather an approach to when you eat, with many people finding it an effective strategy for weight loss. If you’re considering trying IF, understanding the different methods and how to safely incorporate it into your lifestyle is crucial. This detailed guide will explain how to practice intermittent fasting for weight loss, providing actionable steps and essential tips for success.

    Understanding How Intermittent Fasting Works for Weight Loss

    Intermittent fasting can contribute to weight loss through several mechanisms:

    • Calorie Reduction: By restricting your eating window, you naturally consume fewer calories over the day, leading to a calorie deficit.
    • Hormonal Changes: Fasting periods can lead to changes in hormone levels that promote fat burning. This includes a decrease in insulin (which signals fat storage) and an increase in norepinephrine (which helps break down fat).
    • Metabolic Flexibility: IF may help your body become more efficient at switching between burning glucose (from food) and burning stored fat for energy.

    Important Disclaimer: Before starting any new eating pattern, especially one that involves fasting, it is highly recommended to consult with a healthcare professional or a registered dietitian, especially if you have underlying health conditions, are pregnant, breastfeeding, or taking medications.

    1. Choose an Intermittent Fasting Method

    There are several popular IF protocols. Selecting one that fits your lifestyle is key to long-term adherence.

    • 16/8 Method (Leangains Protocol):
      • How it works: Fast for 16 hours each day and eat during an 8-hour window. For example, if your eating window is 12 PM to 8 PM, you fast from 8 PM until 12 PM the next day.
      • Pros: Generally considered the easiest to start with and sustain. It often involves skipping breakfast.
      • Cons: Requires consistency daily.
      • Best for: Beginners, those looking for a sustainable daily routine.
    • 5:2 Method (The Fast Diet):
      • How it works: Eat normally (without calorie restriction) for five days of the week, and on two non-consecutive days, restrict your calorie intake to 500-600 calories (500 for women, 600 for men).
      • Pros: Flexibility on non-fasting days, suitable for those who prefer not to fast daily.
      • Cons: Fasting days require careful calorie tracking and can be challenging.
      • Best for: Those who prefer intense short fasts over daily restrictions.
    • Eat-Stop-Eat:
      • How it works: Involves one or two 24-hour fasts per week. For example, fasting from dinner on Monday until dinner on Tuesday.
      • Pros: Can lead to significant calorie reduction over the week.
      • Cons: More challenging than 16/8, requires discipline.
      • Best for: More experienced fasters, those seeking significant weight loss.
    • Alternate-Day Fasting (ADF):
      • How it works: Fast every other day. On fasting days, you either consume no calories or very few (around 500 calories). On eating days, you eat normally.
      • Pros: Can be very effective for weight loss.
      • Cons: Can be very difficult to sustain due to frequent fasting days.
      • Best for: Experienced fasters, those who can tolerate more frequent fasting.
    1. Prepare Your Body and Mind

    Successful IF requires some initial adjustment.

    • Gradual Approach: Don’t jump straight into a 24-hour fast. Start with shorter fasting windows (e.g., 12 hours) and gradually extend them as your body adapts. If doing 16/8, gradually push back your first meal.
    • Hydrate Adequately: During fasting periods, it’s crucial to drink plenty of calorie-free fluids.
      • Water: Plain water is your best friend.
      • Black coffee: Unsweetened, no cream or milk.
      • Plain tea: Unsweetened, no milk.
      • Sparkling water: Unflavored.
    • Electrolytes (Optional but Recommended): Especially in longer fasts, consider adding a pinch of Himalayan pink salt to your water for electrolytes, or consume electrolyte supplements that are calorie-free.
    • Manage Hunger Pangs: Hunger comes in waves. Recognize that it will pass. Distract yourself with activities, drink more water, or have a calorie-free beverage.
    • Listen to Your Body: If you feel unwell, dizzy, or excessively weak, break your fast. IF should support your health, not jeopardize it.
    1. What to Eat During Your Eating Window

    While IF focuses on when you eat, what you eat is equally important for weight loss and overall health. IF is not a license to eat unhealthy foods.

    • Focus on Whole, Unprocessed Foods:
      • Lean Proteins: Chicken, fish, eggs, tofu, legumes. These help with satiety and muscle preservation.
      • Healthy Fats: Avocados, nuts, seeds, olive oil. Essential for hormone production and satiety.
      • Fiber-Rich Carbohydrates: Whole grains, fruits, vegetables. Provide sustained energy and digestive health.
    • Prioritize Nutrient Density: Make sure your meals are packed with vitamins and minerals to compensate for the shorter eating window.
    • Avoid Overeating: It’s easy to overcompensate during the eating window. Pay attention to hunger cues and stop when you’re satisfied, not stuffed.
    • Limit Sugary Drinks and Processed Foods: These undermine the metabolic benefits of fasting and contribute to weight gain.
    • Break Your Fast Gently: Avoid large, heavy meals immediately after a long fast, especially if you’re new to IF. Start with easily digestible foods.
    1. Incorporate Exercise

    Exercise complements intermittent fasting for optimal weight loss and body composition changes.

    • Timing of Exercise:
      • Fasted Workouts: Many people prefer exercising in a fasted state (e.g., morning workouts before breaking fast). This may enhance fat burning for some, but listen to your body.
      • Fed Workouts: Others prefer exercising during their eating window or shortly after a meal for better energy.
    • Types of Exercise:
      • Strength Training: Helps preserve muscle mass during weight loss, which is crucial for metabolism.
      • Cardio: Supports calorie expenditure and cardiovascular health.
    • Adjust Intensity: If you’re new to IF, or feeling low on energy during a fast, consider lower-intensity workouts.
    1. Monitor Progress and Adjust

    Consistency and tracking are key to seeing results.

    • Track Your Eating and Fasting Windows: Use a simple journal or an app (e.g., Zero, Fastic) to log your fasting and eating times.
    • Monitor Weight and Measurements: Track your weight weekly, and consider taking body measurements (waist, hips) every few weeks. Remember that weight fluctuations are normal.
    • Observe Energy Levels and Mood: Pay attention to how you feel. If you’re consistently lethargic, irritable, or experiencing severe hunger, your chosen method might be too aggressive, or your diet during the eating window needs adjustment.
    • Be Patient: Weight loss is a gradual process. Stick to your chosen method for several weeks before evaluating its effectiveness and making major changes.
    • Troubleshoot Challenges:
      • Extreme hunger: Ensure you’re eating enough nutrient-dense food during your eating window. Increase protein and fiber.
      • Headaches: Often due to dehydration or electrolyte imbalance. Drink more water, consider a pinch of salt.
      • Difficulty sleeping: Avoid caffeine late in your eating window. Ensure your fasting window isn’t too long.
      • Social challenges: Plan meals around social events. Be flexible; one missed fast won’t derail progress.

    By systematically applying these steps, choosing a method that suits you, and listening to your body, you can effectively practice intermittent fasting for weight loss and integrate it as a sustainable part of a healthier lifestyle.

  • How to Gain Muscle and Loss Fat at the Same Time

    How to Gain Muscle and Loss Fat at the Same Time

    The process of simultaneously gaining muscle and losing fat, often referred to as body recomposition, is a highly sought-after but challenging goal in fitness. While traditionally thought to be mutually exclusive, it is indeed possible, especially for certain individuals, by strategically combining nutrition, strength training, and cardio. This how-to guide will break down the essential steps to achieve body recomposition effectively. Achieving muscle gain while losing fat requires a precise and consistent approach. It’s not about quick fixes but sustainable lifestyle changes. Here’s a step-by-step guide:

    Step 1: Understand Your Caloric Intake

    The foundation of body recomposition lies in managing your calorie intake.

    • Slight Calorie Deficit or Maintenance for Fat Loss: To lose fat, you generally need to be in a calorie deficit, meaning you consume fewer calories than your body burns. However, for body recomposition, this deficit should be slight (around 200-300 calories below maintenance) or you can even aim for calorie maintenance. A large deficit can hinder muscle growth.
    • Calculate Your Maintenance Calories: Use an online TDEE (Total Daily Energy Expenditure) calculator to estimate your daily calorie needs to maintain your current weight. This is your starting point.
    • Adjust Based on Progress: Monitor your weight and body composition weekly. If you’re losing fat but not gaining muscle, slightly increase your calories. If you’re gaining weight too quickly (likely fat), slightly reduce them. This is an iterative process.

    Step 2: Prioritize Protein Intake

    Protein is paramount for muscle growth and fat loss.

    • High Protein Intake: Aim for a high protein intake, roughly 1.6 to 2.2 grams of protein per kilogram of body weight (or 0.7 to 1 gram per pound). This helps preserve muscle mass in a deficit and supports muscle repair and growth.
    • Distribute Protein Throughout the Day: Spread your protein intake across multiple meals to optimize muscle protein synthesis.
    • Good Protein Sources: Include lean meats (chicken, turkey, lean beef), fish, eggs, dairy, legumes, and protein supplements (whey, casein, plant-based) in your diet.

    Step 3: Optimize Macronutrient Ratios

    While protein is king, carbohydrates and fats also play crucial roles.

    • Carbohydrates for Energy: Don’t fear carbs. They provide essential energy for your workouts and fuel muscle recovery. Focus on complex carbohydrates like whole grains, fruits, and vegetables. Adjust carbohydrate intake based on your activity level. On training days, you might consume more carbs.
    • Healthy Fats for Hormonal Balance: Healthy fats are vital for hormone production and overall health. Include sources like avocados, nuts, seeds, and olive oil. Aim for 0.5 to 1 gram of fat per kilogram of body weight.

    Step 4: Implement Effective Strength Training

    Strength training is non-negotiable for muscle gain.

    • Lift Heavy, Progressively: Focus on progressive overload, meaning you consistently increase the challenge to your muscles. This could be by lifting heavier weights, increasing repetitions, doing more sets, or decreasing rest times.
    • Compound Exercises: Prioritize compound movements that work multiple muscle groups simultaneously, such as squats, deadlifts, bench presses, overhead presses, and rows. These are highly effective for building overall muscle mass.
    • Training Frequency: Aim for 3-5 strength training sessions per week, hitting each major muscle group 2-3 times per week.
    • Rep Ranges: Incorporate a mix of rep ranges. While higher reps can be good for endurance, 6-12 reps per set are generally effective for hypertrophy (muscle growth).

    Step 5: Incorporate Strategic Cardio

    Cardio plays a supporting role in fat loss without compromising muscle mass.

    • Moderate Cardio: Avoid excessive cardio, especially high-intensity steady-state cardio, which can hinder muscle growth.
    • HIIT (High-Intensity Interval Training): Short bursts of intense exercise followed by brief rest periods can be very effective for fat loss while potentially preserving muscle. Limit HIIT to 1-2 sessions per week.
    • LISS (Low-Intensity Steady-State) Cardio: Walking or light cycling can be done more frequently to increase calorie expenditure without significantly impacting recovery or muscle growth.
    • Timing: Consider doing cardio on separate days from your strength training, or after your strength training session, to avoid negatively impacting your lifts.

    Step 6: Prioritize Sleep and Recovery

    Recovery is where your muscles actually grow.

    • Adequate Sleep: Aim for 7-9 hours of quality sleep per night. Sleep is crucial for hormone regulation (growth hormone, testosterone, cortisol) and muscle repair.
    • Stress Management: High stress levels can increase cortisol, which can hinder fat loss and muscle gain. Incorporate stress-reducing activities into your routine.
    • Rest Days: Allow your body adequate rest days between intense training sessions. This gives your muscles time to repair and rebuild.

    Step 7: Stay Hydrated

    Water is essential for all bodily functions, including metabolism and nutrient transport.

    • Drink Plenty of Water: Aim for at least 2-3 liters of water per day, more if you’re active or in a hot climate. Proper hydration supports performance and recovery.

    Step 8: Monitor Progress and Adjust

    Tracking your progress is critical for success in body recomposition.

    • Regular Measurements: Don’t just rely on the scale. Take body measurements (waist, chest, arms, thighs) and progress photos regularly (e.g., every 2-4 weeks).
    • Body Fat Percentage: Consider getting your body fat percentage measured periodically (e.g., DEXA scan, calipers) for a more accurate picture of your progress.
    • Performance in the Gym: Track your lifts and aim for consistent improvements in strength.
    • Be Patient: Body recomposition is a slow process. It requires consistency and patience. Don’t get discouraged if results aren’t immediate. Celebrate small victories and continue to adjust your approach based on what your body tells you.

    Step 9: Consider Supplements (Optional)

    While not essential, some supplements can support your body recomposition journey.

    • Creatine Monohydrate: Helps improve strength and power output, leading to better workouts and muscle gains.
    • Whey Protein: Convenient source of high-quality protein for post-workout recovery or to hit daily protein targets.
    • Caffeine: Can boost energy and focus during workouts.
    • Omega-3 Fatty Acids: Support overall health and can help reduce inflammation.
    • Vitamin D: Important for bone health and can influence testosterone levels.

    Remember, supplements are just that – supplements to a solid foundation of diet and exercise, not replacements.

    Step 10: Consistency and Mindset

    The most powerful tools in your body recomposition arsenal are consistency and a positive mindset.

    • Adherence is Key: Stick to your nutrition and training plan consistently, even on days you don’t feel like it.
    • Be Patient: Results take time. Embrace the journey and focus on making sustainable changes.
    • Seek Guidance: If you’re unsure, consider consulting a certified personal trainer or registered dietitian. They can provide personalized advice tailored to your specific needs and goals.

    By diligently following these steps, you can effectively work towards the challenging yet rewarding goal of gaining muscle and losing fat at the same time.

  • How to Lose Weight Safely Without Exercise

    How to Lose Weight Safely Without Exercise

    While exercise is a crucial component of overall health, it’s not always feasible for everyone due to injury, time constraints, or personal preference. The good news is that you can still lose weight safely and effectively by focusing on one key factor: your diet. This guide offers a step-by-step approach to changing your eating habits and lifestyle to achieve weight loss goals without exercise. Weight loss is about making smart, sustainable choices that align with your body’s needs.

    Disclaimer: Before making any significant changes to your diet, it’s always best to consult with a healthcare professional or registered dietitian to ensure the plan suits your individual health needs.

    Step 1: Understand the Foundation – The Calorie Deficit

    The cornerstone of weight loss is the calorie deficit.

    A calorie deficit occurs when you consume fewer calories than your body burns in a day. To make up for the energy shortfall, your body starts to burn stored fat, leading to weight loss. While exercise can help burn more calories, you can create a calorie deficit solely through food choices.

    The following steps are designed to help you achieve a sustainable calorie deficit without feeling deprived.

    Step 2: Prioritize High-Quality, Nutrient-Dense Foods

    What you eat matters. Nutrient-dense foods help keep you full while providing essential vitamins and minerals. Focusing on these foods will naturally reduce your calorie intake.

    • Increase Your Protein Intake
      Protein is essential for satiety, helping you feel full for longer. It also increases the thermic effect of food (TEF), meaning your body burns more calories just digesting it.

      • How to do it: Include lean protein in every meal.
      • Examples: Grilled chicken, fish, eggs, Greek yogurt, lentils, beans, tofu.
    • Fill Up on Fiber
      Fiber adds bulk to your meals, helping you feel full without adding excessive calories. It also stabilizes blood sugar levels.

      • How to do it: Fill half your plate with non-starchy vegetables at each meal.
      • Examples: Leafy greens, broccoli, bell peppers, quinoa, fruits like apples, berries, legumes.
    • Choose Healthy Fats
      Healthy fats are essential for hormone function and can contribute to feelings of fullness.

      • How to do it: Include small portions of healthy fats in your diet.
      • Examples: Avocado, nuts, seeds, olive oil.

    Step 3: Master Your Portions and Eating Habits

    How you eat is just as important as what you eat.

    • Practice Portion Control
      Even healthy foods can lead to overeating if portions are too large. Smaller plates can trick your brain into feeling satisfied with less.
      Use your hand as a guide:

      • Protein: Palm-sized portion.
      • Vegetables: Fist-sized portion.
      • Carbs: Cupped-hand portion.
      • Fats: Thumb-sized portion.
    • Embrace Mindful Eating
      Eating distractedly can lead to overeating. Mindful eating helps you reconnect with your body’s hunger and fullness cues.

      • How to do it:
        • Sit down at a table without distractions.
        • Eat slowly and chew thoroughly.
        • Pay attention to flavors and textures.
        • Stop when you feel comfortably full.
    • Avoid Liquid Calories
      Sugary drinks can add hundreds of calories without providing lasting satiety.

      • How to do it: Stick to water, herbal teas, or black coffee for a calorie-free boost.

    Step 4: Optimize Your Lifestyle for Weight Management

    Lifestyle habits can also affect your weight loss efforts.

    • Stay Hydrated
      Water is essential for weight loss. Thirst is often mistaken for hunger, leading to overeating.

      • How to do it: Drink 8-10 glasses of water daily. Keep a water bottle on hand to stay hydrated.
    • Prioritize Sleep
      Poor sleep disrupts hunger-regulating hormones, leading to increased appetite and cravings.

      • How to do it: Aim for 7-9 hours of sleep each night. Create a calming bedtime routine to improve sleep quality.
    • Manage Stress
      Chronic stress increases cortisol, which can boost appetite and promote fat storage, especially around the belly.

      • How to do it: Find healthy stress management techniques, such as meditation, deep breathing exercises, or spending time in nature.

    By following these deliberate, evidence-based strategies, you can successfully achieve a sustainable weight loss journey, even without exercise. The power to manage your weight starts right in your kitchen!

  • How to Meal Prep for Weight loss Beginners

    How to Meal Prep for Weight loss Beginners

    Starting a weight loss journey can feel overwhelming, but meal prepping is one of the most effective strategies to stay on track. For beginners, it simplifies healthy eating, reduces reliance on quick, unhealthy options, and helps control portion sizes. This guide will break down how to meal prep for weight loss beginners into manageable steps, focusing on simplicity, consistency, and sustainable habits.

    Why Meal Prep for Weight Loss?

    Meal prepping offers significant advantages for weight loss beginners:

    • Portion Control: Pre-portioned meals eliminate guesswork and prevent overeating.
    • Time-Saving: Reduces daily cooking time, especially on busy weekdays.
    • Cost-Effective: Less money spent on takeout, delivery, or unhealthy convenience foods.
    • Reduced Decision Fatigue: No need to figure out what to eat for every meal, reducing the likelihood of impulsive, unhealthy choices.
    • Consistent Healthy Eating: Ensures you always have nutritious, balanced meals ready.
    • Avoidance of Temptation: Less likelihood of reaching for unhealthy snacks when hunger strikes.

    Key Principles for Beginner Weight Loss Meal Prep

    • Keep it Simple: Don’t overcomplicate recipes or try to prep too many different meals at once.
    • Focus on Macronutrients: Aim for a balance of lean protein, complex carbohydrates, and healthy fats.
    • Prioritize Vegetables: Load up on non-starchy vegetables for volume and nutrients with low calories.
    • Batch Cook: Cook larger quantities of staple ingredients.
    • Invest in Containers: Good quality, portion-controlled containers are essential.

    Step-by-Step Guide: How to Meal Prep for Weight Loss Beginners

    Follow these steps to successfully meal prep for weight loss as a beginner.

    Phase 1: Planning Your Meals (The Blueprint for Success)

    1. Determine Your Calorie/Macro Needs (Optional but Recommended):
      • While not strictly necessary for beginners, understanding your estimated daily calorie deficit for weight loss can be helpful. Numerous online calculators can provide a rough estimate. For simple weight loss, focusing on whole, unprocessed foods and mindful portions is often enough.
      • Aim for a balance: roughly 30-40% protein, 30-40% carbs, 20-30% healthy fats. This helps with satiety and energy.
    2. Choose Your Meals (Start Small):
      • As a beginner, don’t try to prep every single meal for the entire week.
      • Start with 3-4 days of lunches and dinners, or just one meal type (e.g., just lunches for the work week).
      • Select simple, repeatable recipes. Think: “protein + veggie + carb.”
      • Example Meal Ideas for Beginners:
        • Lunch: Grilled chicken breast, roasted broccoli, quinoa.
        • Dinner: Baked salmon, mixed greens salad, sweet potato.
        • Breakfast: Overnight oats with berries and a scoop of protein powder.
        • Snacks: Hard-boiled eggs, Greek yogurt, apple slices with peanut butter, handful of almonds.
    3. Create Your Grocery List:
      • List all the ingredients you need for your chosen meals.
      • Organize your list by supermarket sections (produce, dairy, pantry, meat) to save time.
    4. Check Your Current Supplies:
      • Before heading to the store, check your pantry, fridge, and freezer to avoid buying duplicates.

    Phase 2: Shopping for Ingredients (Efficient Acquisition)

    1. Stick to Your List: This is crucial for weight loss and budget control. Avoid impulse buys, especially in snack aisles.
    2. Prioritize Whole Foods:
      • Lean Proteins: Chicken breast, turkey, lean ground beef, fish (salmon, cod), eggs, tofu, lentils, beans.
      • Complex Carbohydrates: Brown rice, quinoa, whole-wheat pasta, oats, sweet potatoes, whole-grain bread.
      • Non-Starchy Vegetables: Broccoli, cauliflower, bell peppers, spinach, kale, zucchini, green beans, carrots, salad greens. Buy plenty!
      • Healthy Fats: Avocados, nuts (almonds, walnuts), seeds (chia, flax), olive oil.
      • Fruits: Berries, apples, oranges, bananas.

    Phase 3: The Prep Session (Cooking and Assembling)

    Designate a specific time for your prep session, usually 2-3 hours on a weekend.

    1. Gather Your Tools:
      • Meal Prep Containers: Invest in good quality, BPA-free, airtight containers. Glass containers are excellent for reheating. For beginners, containers with separate compartments can help with portioning.
      • Cutting boards, sharp knives, mixing bowls, baking sheets, pots, and pans.
    2. Start with Ingredients That Take Longest to Cook:
      • Grains: Cook a large batch of brown rice or quinoa (e.g., 4-6 servings).
      • Starchy Vegetables: Roast or bake sweet potatoes, potatoes.
      • Proteins: Bake or grill a large batch of chicken breast, salmon fillets, or cook ground meat/turkey.
    3. Prepare Vegetables:
      • Wash and chop all your vegetables. This saves significant time during the week.
      • Roast larger quantities of vegetables like broccoli, bell peppers, or asparagus.
      • Prepare fresh salad components but keep dressing separate.
    4. Cook Smart, Not Hard:
      • One-Pan Roasting: Toss chicken or fish with chopped vegetables and seasoning on a single baking sheet.
      • Sheet Pan Meals: Cook multiple components simultaneously.
      • Slow Cooker/Instant Pot: Use these for large batches of stews, chili, or shredded chicken/pork.
    5. Cool Down Before Storing:
      • Let all cooked food cool completely to room temperature before portioning and sealing. This prevents condensation and bacterial growth.
    6. Portion and Package:
      • Divide your cooked food into individual meal prep containers according to your desired portion sizes.
      • Keep wet ingredients (like dressings or sauces) separate until just before eating.
      • Label containers with the meal and date, especially if prepping for more than a few days.

    Phase 4: Storage and Reheating (Maintaining Freshness and Safety)

    1. Refrigeration:
      • Most prepped meals will last 3-4 days in the refrigerator.
      • Place meals in the coldest part of your fridge.
    2. Freezing (for longer storage):
      • Many meals can be frozen for up to 1-3 months.
      • Good candidates for freezing: cooked grains, cooked proteins (chicken, ground meat), soups, stews, chili.
      • Avoid freezing: leafy greens, watery vegetables (like cucumber), and foods that lose texture upon thawing (e.g., cooked pasta can get mushy).
      • Thaw frozen meals overnight in the refrigerator before reheating.
    3. Reheating:
      • Microwave: The quickest option. Remove lids or use microwave-safe containers.
      • Oven/Toaster Oven: Good for roasted vegetables or proteins to regain some crispness. Use oven-safe dishes.
      • Stovetop: For reheating soups, chili, or stir-fries.

    My Personal Experience with Beginner Meal Prep

    When I first started trying to lose weight, my biggest hurdle was making healthy choices when I was already hungry and tired after a long day. I’d come home, open the fridge, see nothing prepped, and inevitably order takeout. Meal prepping seemed intimidating at first – all those Instagram photos of perfectly organized fridges! But I started small. I picked one simple recipe: baked chicken, roasted broccoli, and brown rice. I cooked a big batch on Sunday, portioned it into four containers, and that was it. Just having those four lunches ready made a huge difference. I saved money, consistently ate healthier, and avoided those impulsive, unhealthy dinner decisions. It wasn’t about being perfect; it was about being prepared, and that small step snowballed into a sustainable habit.

    Conclusion

    Meal prepping for weight loss beginners is a powerful habit that simplifies healthy eating and supports your goals. By focusing on simple planning, smart shopping, efficient cooking, and proper storage, you can consistently provide yourself with nutritious, portion-controlled meals. Start small, build consistency, and adapt the process to fit your lifestyle. With each successful meal prep session, you’ll gain confidence and make significant strides towards your weight loss goals.